Migrating VMs from vSphere to Azure using Veeam

Early last year I ran into an issue where we needed to move virtual machines from ESXi 5.5 to Azure. Although the support matrix said that both vSphere 5.5 and Windows 2003 were supported by the migration tool, we could successfully migrate the VM using the migration tool as I demonstrated in an earlier post.

What we ended up doing instead was using Veeam to migrate the VM to Azure. I had heard of this from a Veeam rep at a conference a few years prior, but until that point, I never had a use case for that information. Below I will demonstrate how to migrate a VM from vSphere 7 to Microsoft Azure using the Veeam restore feature. In this example, I’m using a Server 2022 VM, but it will work similarly for any Windows VM.

Prerequisites

  • An existing Azure subscription
  • Azure Storage Account
  • A backup of the VM you would like to migrate (with RDP enabled)
  • An existing network security group with an inbound rule allowing RDP

Step 1: Ready the Veeam Environment

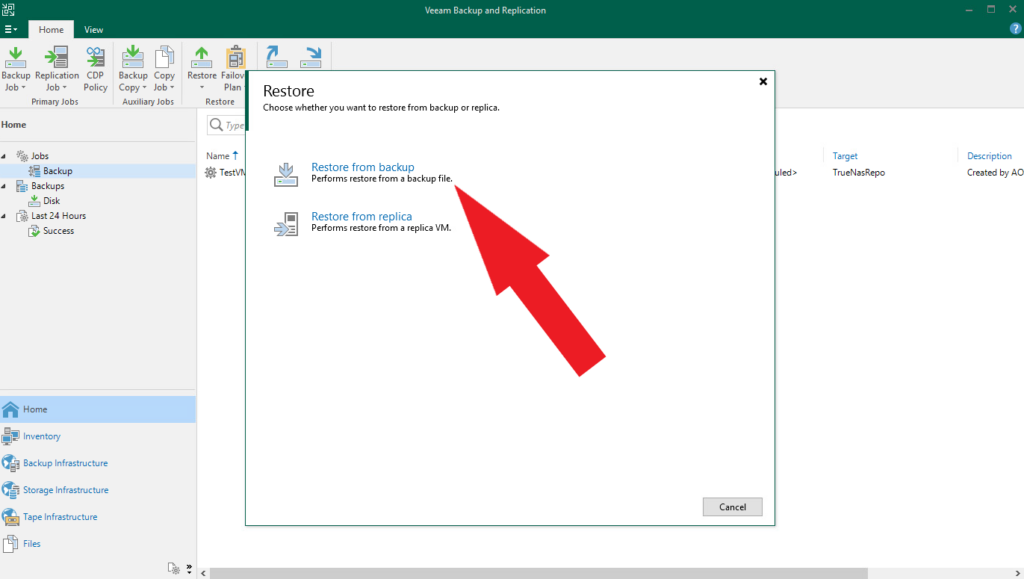
The first thing we will need to do is ready the Veeam environment. The way we do this is a little counterintuitive. We will start by clicking Restore in the home ribbon in Veeam.
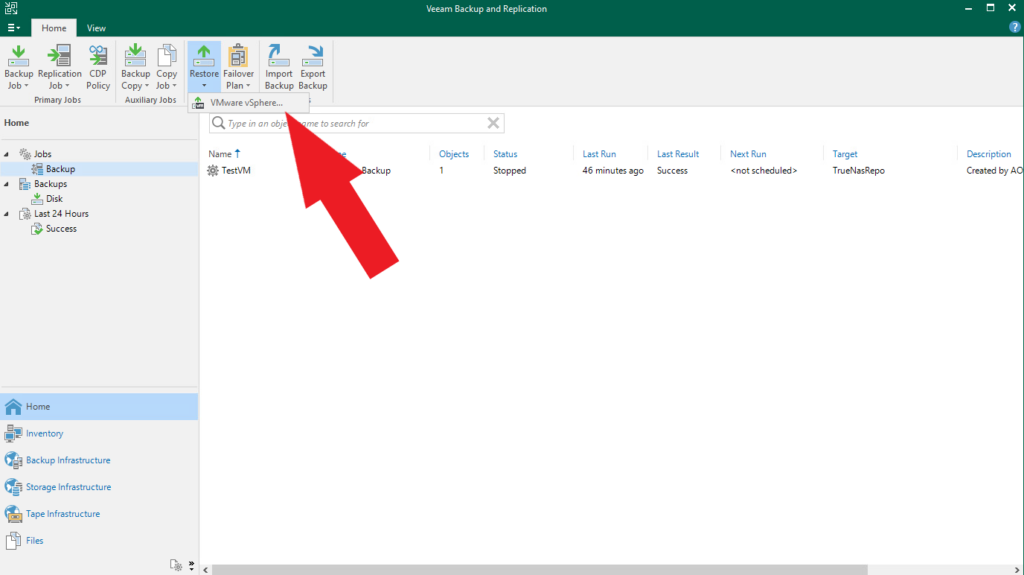
Then we will choose “Restore from Backup”.
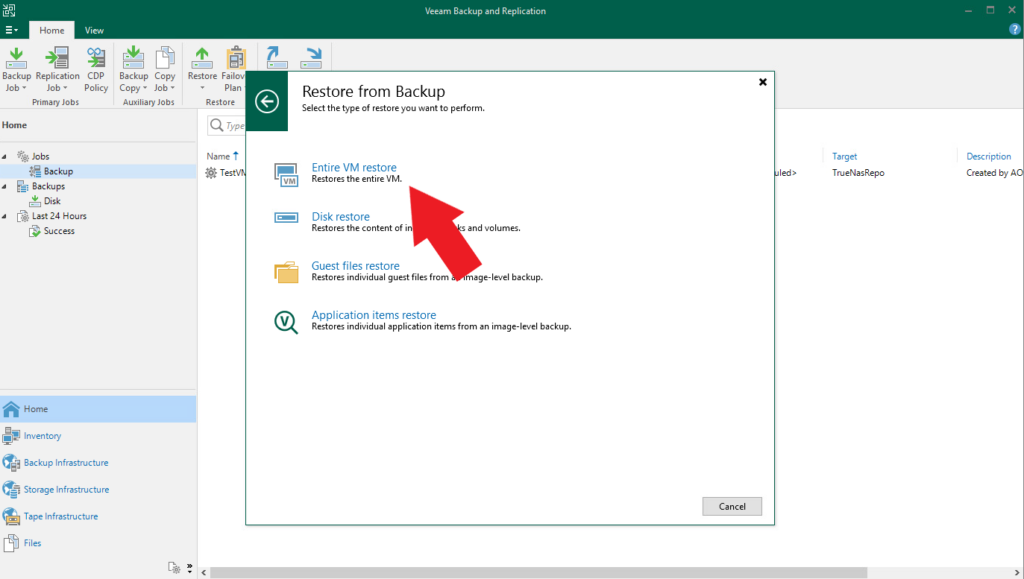
Next, we will choose “Entire VM Restore”.
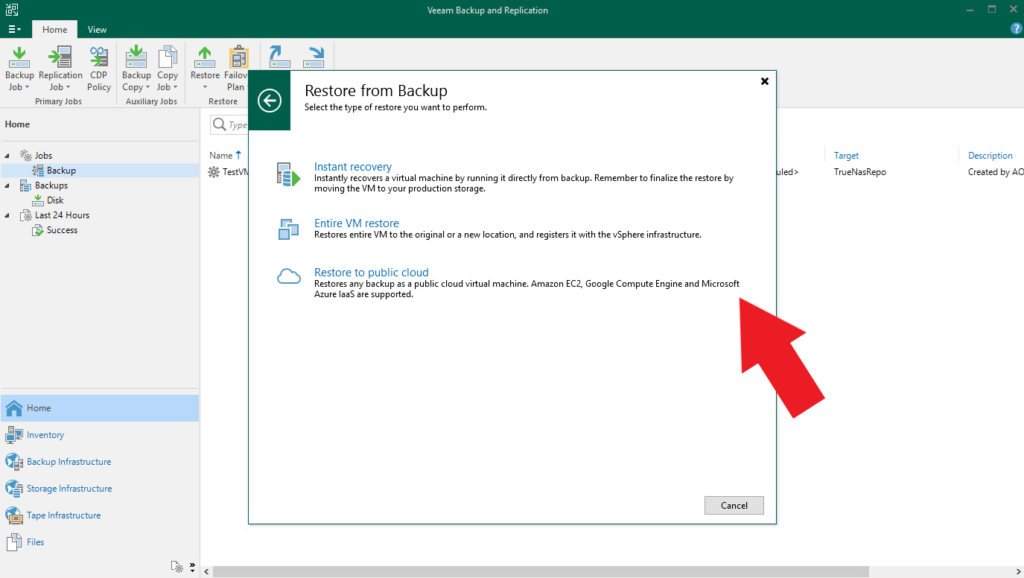
Then select “Restore to Public Cloud”
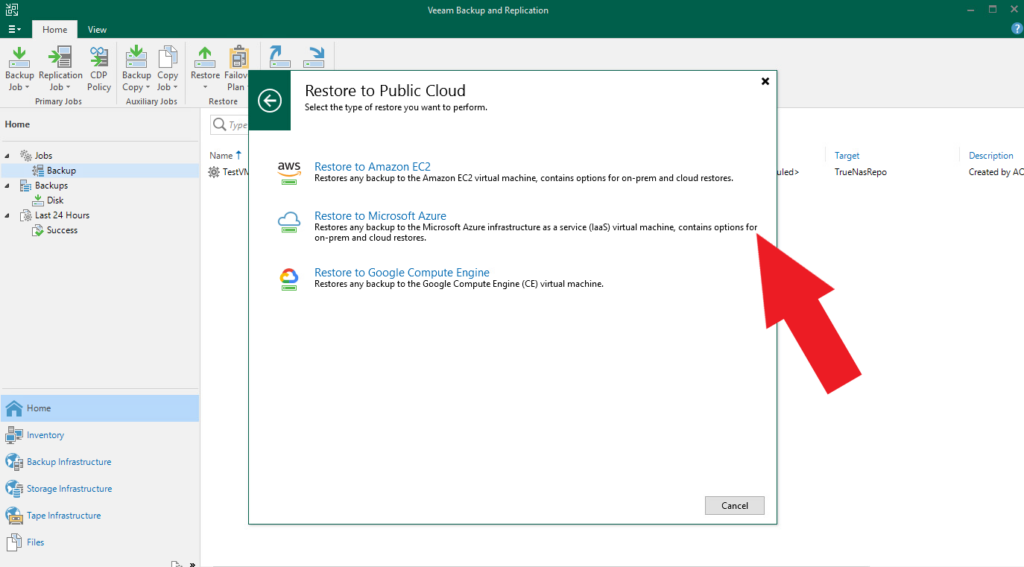
Finally, click on “Restore to Microsoft Azure”
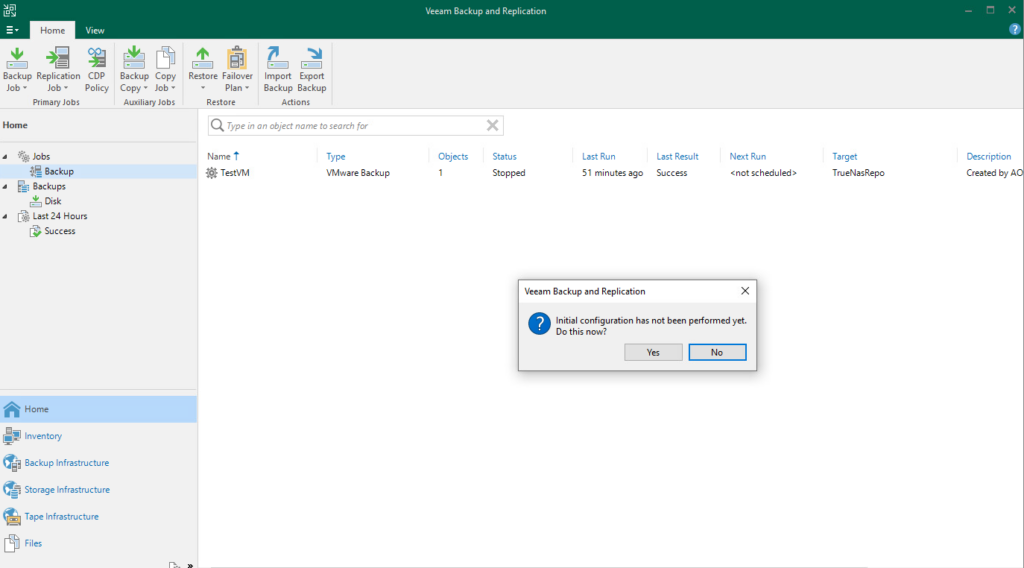
Now that you have navigated through the menus above, you will be presented with a menu asking you to perform the initial configuration. Click “Yes”.
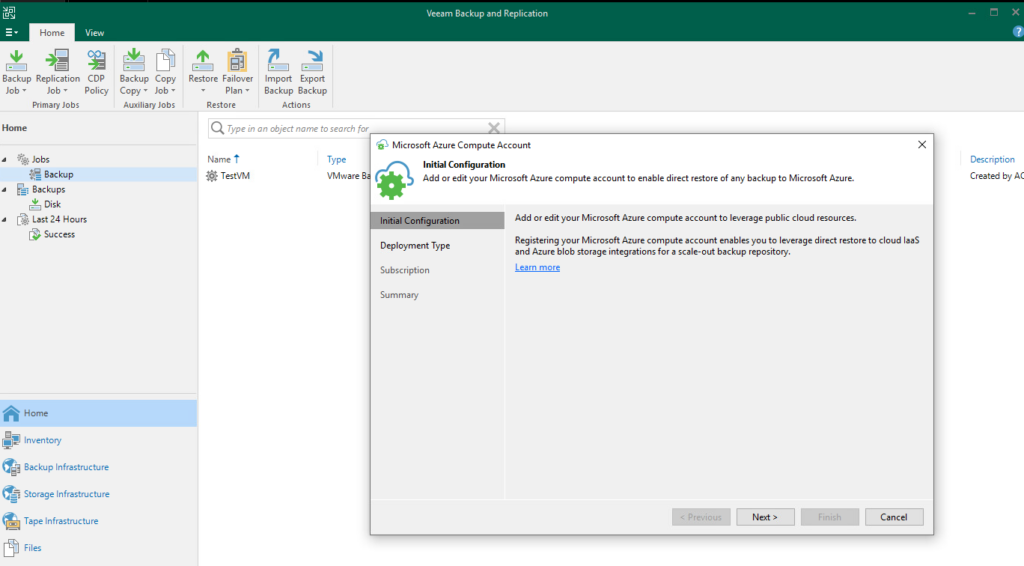
The initial configuration screen is of no consequence. Just click “Next”
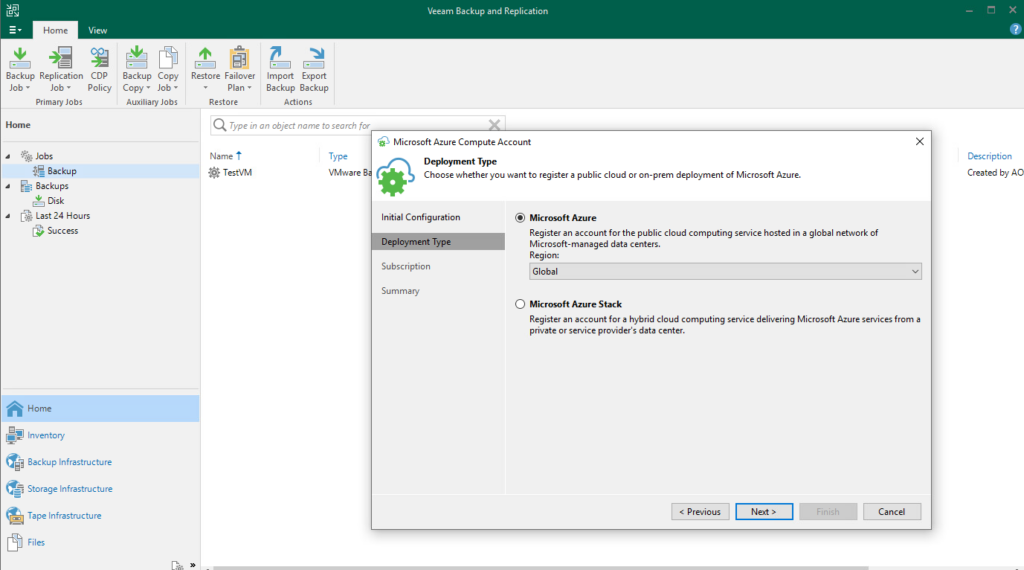
The next screen is where you will choose the deployment type. The choices are between the Gov, China, and Global Azure accounts. The default is fine. Click “Next”.
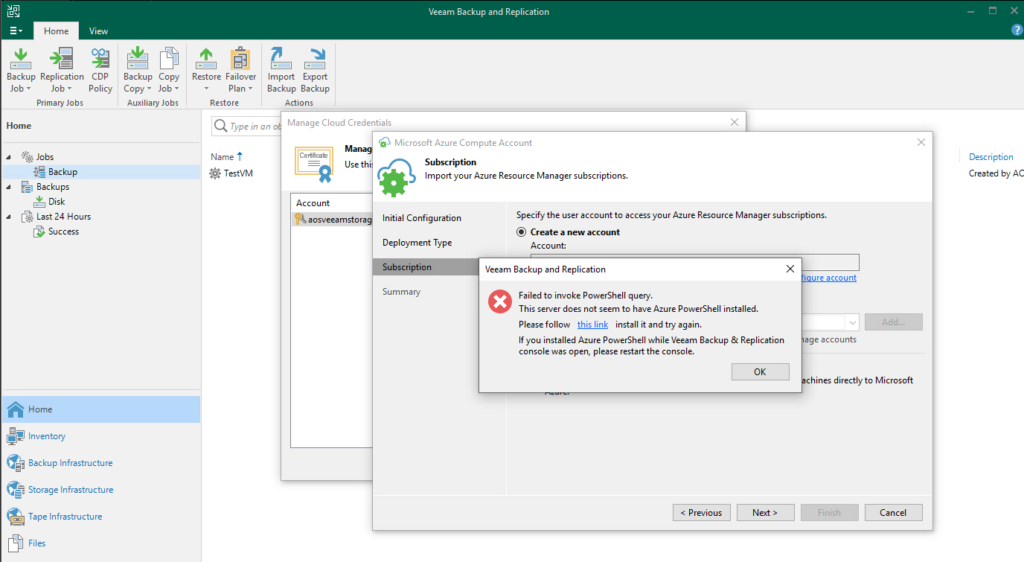
The next screen will allow you to add new Azure credentials or use an existing one. If you choose to add new credentials, which I have chosen to do here, you will likely see the error message displayed below. Veeam uses Azure PowerShell to connect to Azure and the wizard will prompt you to install Azure PowerShell. This is an easy process because the link given will help you install Azure PowerShell in a few clicks.

Note: The language in the screen below is a bit imprecise. “Create a new account” does not actually create a new account. It simply configures existing Azure credentials and saves them to Veeam.
With the installation finished you are now prompted to enter your Azure credentials.
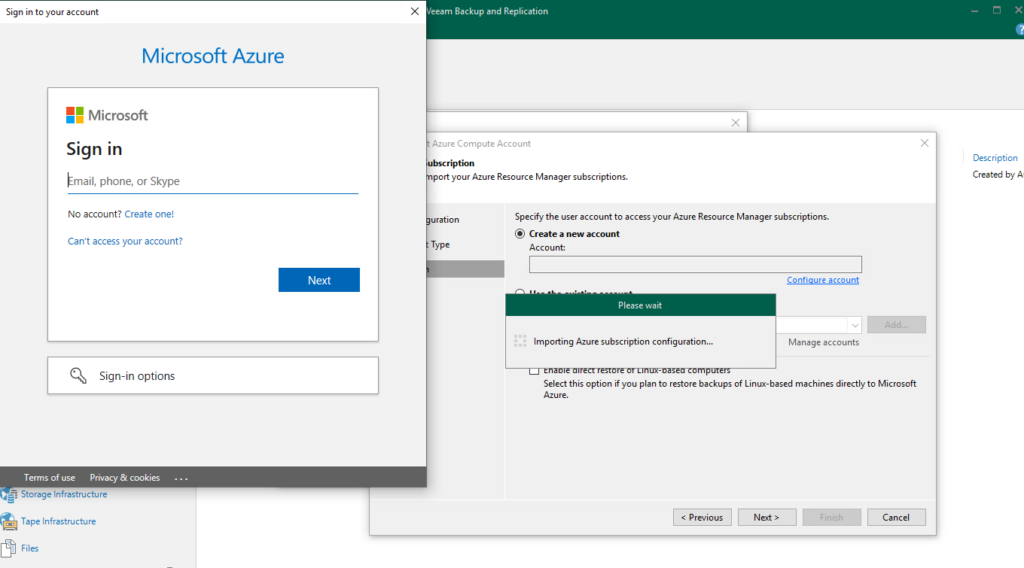
Step 2: Perform the Restore

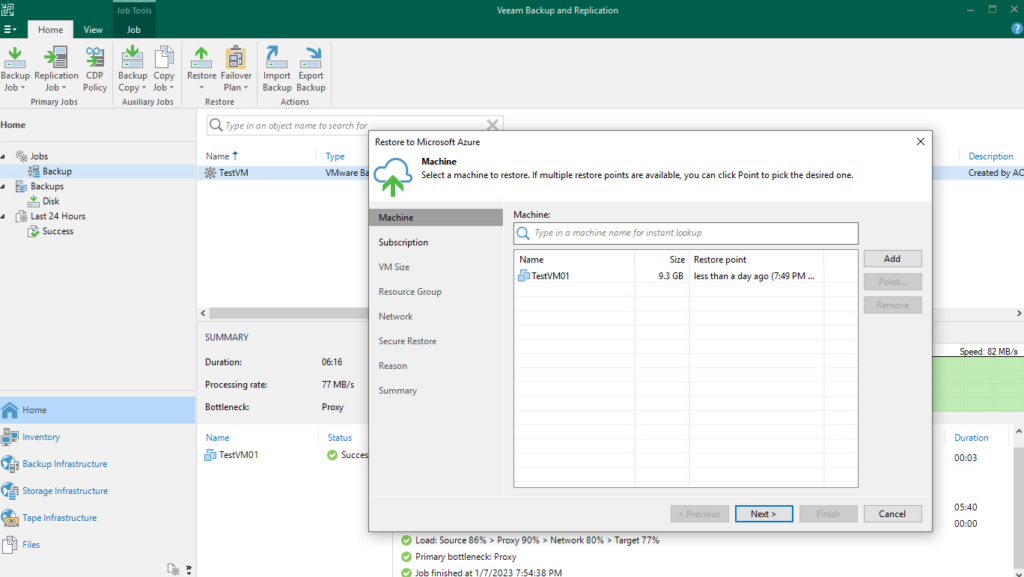
The wizard will ask you to add a VM to be restored. I have chosen to restore from a backup as you see below.

Note: Your VM should have RDP and DHCP enabled. If not, you will not be able to connect to the machine once it is restored.
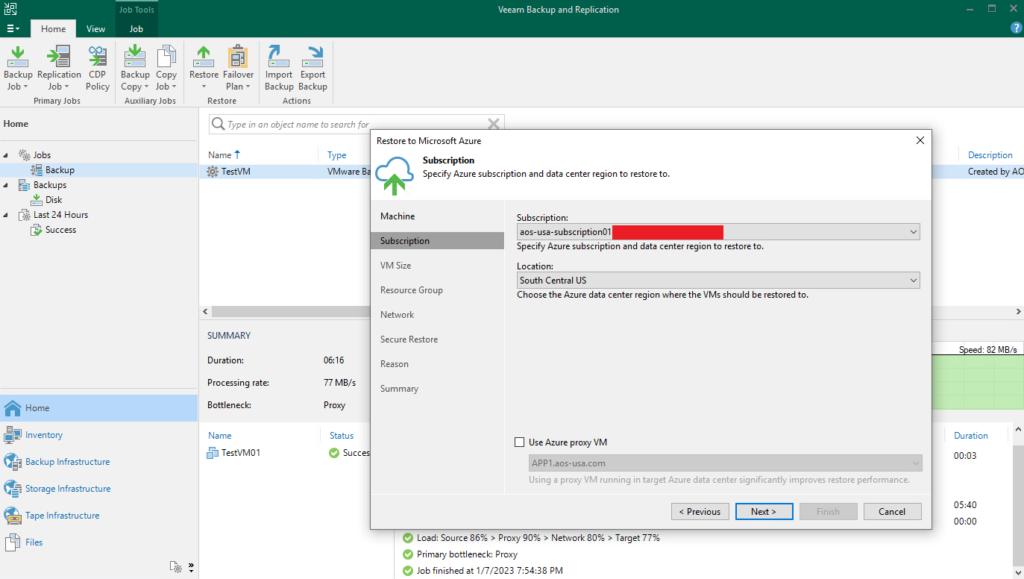
Next, you will choose the region where the VM will be restored to. Remember that this region must be the same as your storage account.
Now, you must choose the VM size and the storage account. This is a good opportunity to resize the VM if it was previously too large.

Next, you’re given the opportunity to place the VM in an existing resource group or to create a new resource group.
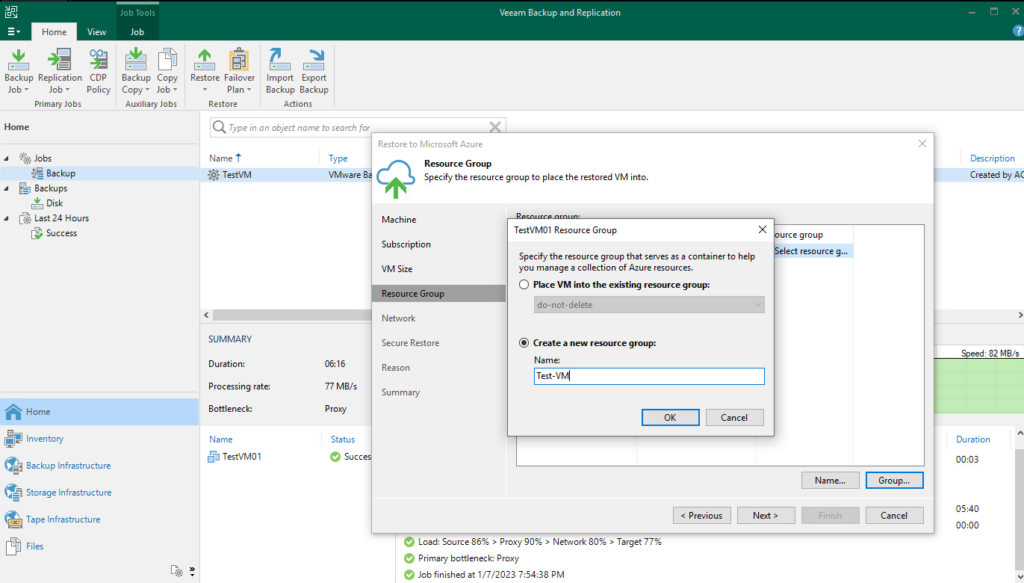
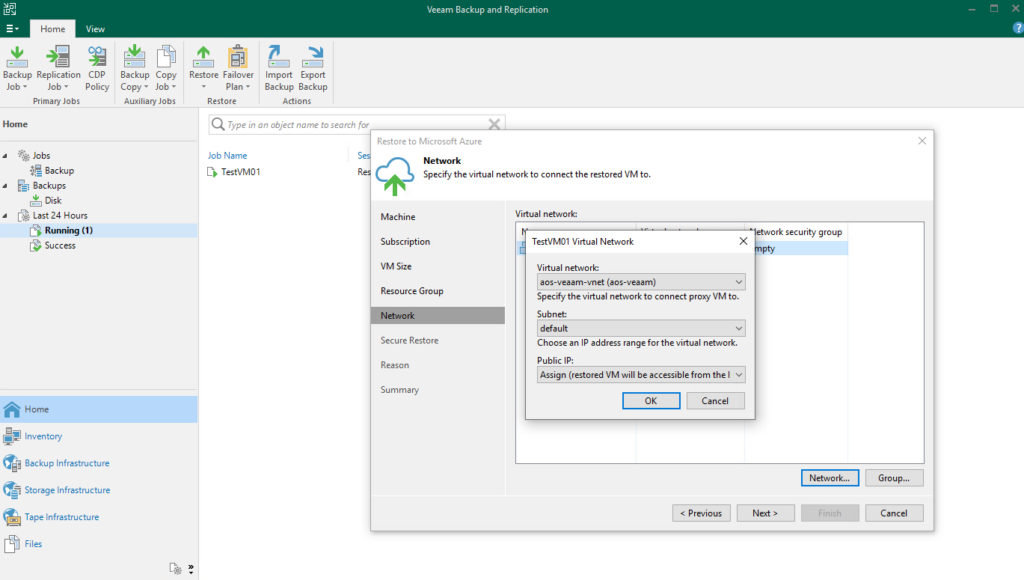
Now, you’re able to choose the network and network security group.

Note: I chose to assign a public IP for testing purposes. But normally, you would have either an express route or a VPN from on-prem.
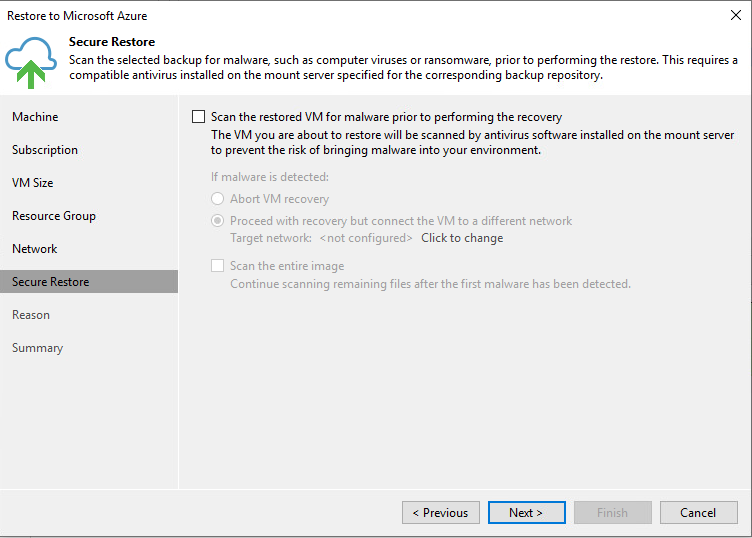
The last item to configure is whether or not to scan the restored VM for malware prior to recovery. I chose not to do this because my VM is a fresh install of Server 2022.
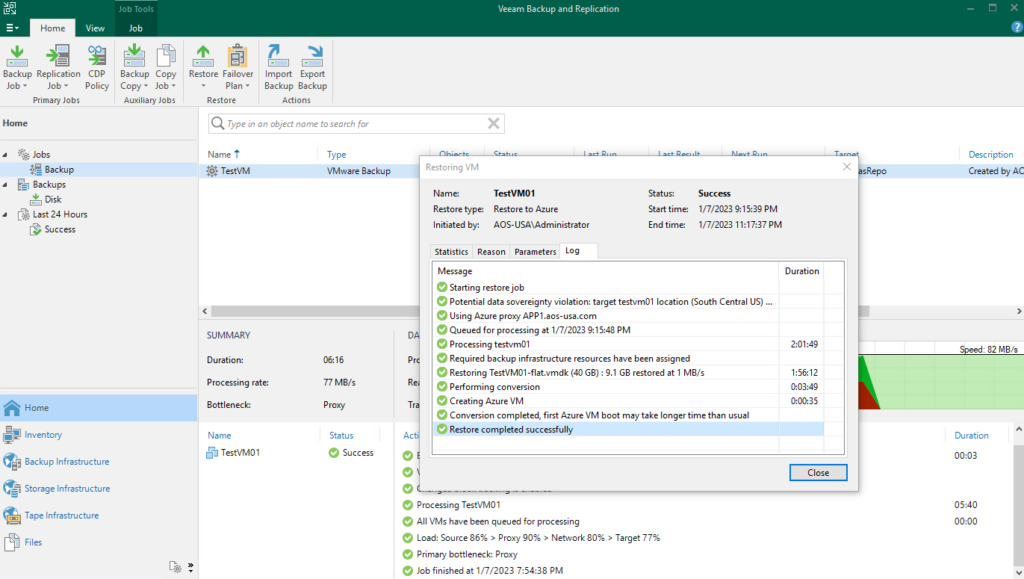
Finally, the restoration will start and you will be able to watch the progress similar to the screen below.
Step 3: Verifying the VM Restoration

Once your VM has completed its restoration process, you’ll want to make sure that you can connect to it. First, you will need to navigate to the resource in Azure, click “Connect” and download the RDP file.
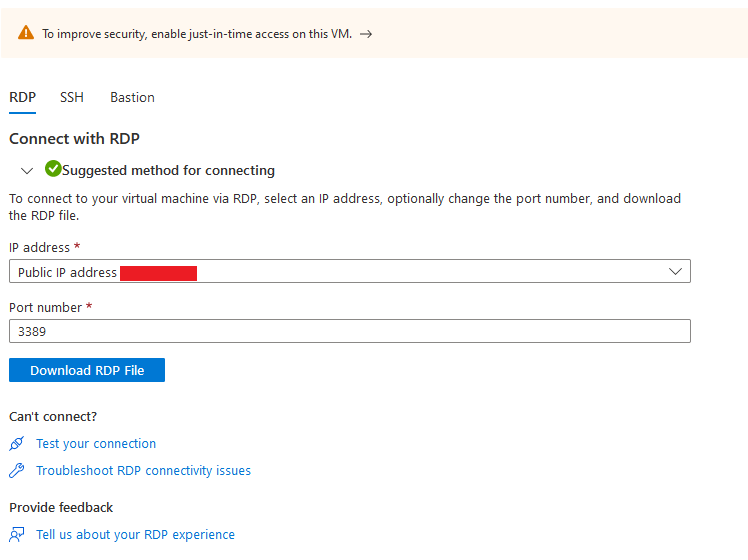
You should be able to open the RDP file and connect directly to the VM.

Conclusion

Using Veeam restore to migrate VMs to the cloud can be a great alternative to using the Azure Migration tool.

How I studied for the AZ-305 Designing Microsoft Azure Infrastructure Solutions Exam

I recently took and passed the AZ-305 exam. I wanted to share some of the resources I used so that they may help someone else take and pass this exam. I took the AZ-104 exam four months before and felt there was a natural progression, but the AZ-305 was much more difficult.

Free Microsoft Resources

There are three resources from Microsoft that I found helpful in studying for this exam. First is the Microsoft Learn portal. It has tons of modules to browse through, especially if you only need help with certain concepts. Second, there is the lab material on GitHub. Third, is the study guide, which gives you an outline of what topics you should fully understand in order to pass the exam.

John Savill’s Technical Training on YouTube

Just as I did in studying for the AZ-104 exam, I relied heavily on John Savill’s videos on YouTube. Specifically, the AZ-305 playlist and the AZ-305 study cram video. These videos were crucial for me to better understand what I had read.

Playing Around in the Azure Environment

Just like with my AZ-104 exam preparation, I cannot overstate how important it is to actually play around in Azure. Create a VM. Create a resource group. Peer a network. All of these things were very important for me to understand how the different services interact.

Using the Official Practice Test from MeasureUp

Once I felt that I had mastered all the concepts, I turned to the official practice test from MeasureUp to ensure that I had a feel for what type of questions would be asked. This helped me bring everything I learned together.

Conclusion

These are the tools that I found invaluable in helping me learn the material needed to pass this exam. I hope that they can be of service to you as well.

How I studied for the AZ-104 Azure Administrator Associate Exam

When I took the Azure AZ-104 exam in August, I was able to pass confidently because I used the following resources. I hope that if you’re studying for the exam, you find the same resources helpful.

Exam Ref AZ-104 Microsoft Azure Administrator

I actually bought and read the physical copy of the exam reference guide from Microsoft. I took it with me everywhere for about a month. Anytime I had to wait for anything, I started reading the book. This helped me build a framework for understanding the various concept the exam covers.

Playing Around in the Azure Environment

I cannot overstate how important it is to actually play around in Azure. Create a VM. Create a resource group. Peer a network. All of these things were very important for me to understand how the different services interact.

John Savill’s Technical Training on YouTube

John Savill’s AZ-104 playlist and study cram video were very instrumental in helping me pull all the concepts together. It is amazing that all his content is available on YouTube for free.

Using Tutorials Dojo Practice Exams

The Tutorials Dojo practice exams helped me bring all the concepts together. The questions were similar in concept to what was in the exam, but crucially, they were not brain dumps. The reason I like practice exams is that I learn to think a little more critically about scenarios that I may experience in real life.

Conclusion

These tools helped me study for and pass the exam. I hope that they help you along in your Azure certification journey.

Common Issues when migrating VMs from VMware vSphere On-Prem to Azure

I have been running a VMware home lab with an old Dell PowerEdge R720 with ESXi 7.0.2 installed. I have been running Azure for backups and Key Vault to protect secrets, but now I want to migrate one of my vSphere on-prem VMs. Through this process, I ran into a few issues and “gotchas” that may affect other users. Below is my list of potential issues you may face and how to resolve them.

    A Note About Whether or Not to Use the Migration Appliance

    I started out choosing to use the migration appliance. I downloaded the OVA and installed it in my lab environment. This initially turned out to be a huge hog of resources without any real benefit for my small lab environment. For that reason, when my project would not allow me to add the migration tool and I had to create a new project, I decided to go with the PowerShell script install on an existing server. If you decide to do the same, remember that you must use a Windows Server OS.

    Issue 1: Azure Migration Project Tool Will Not Add to Your Dashboard

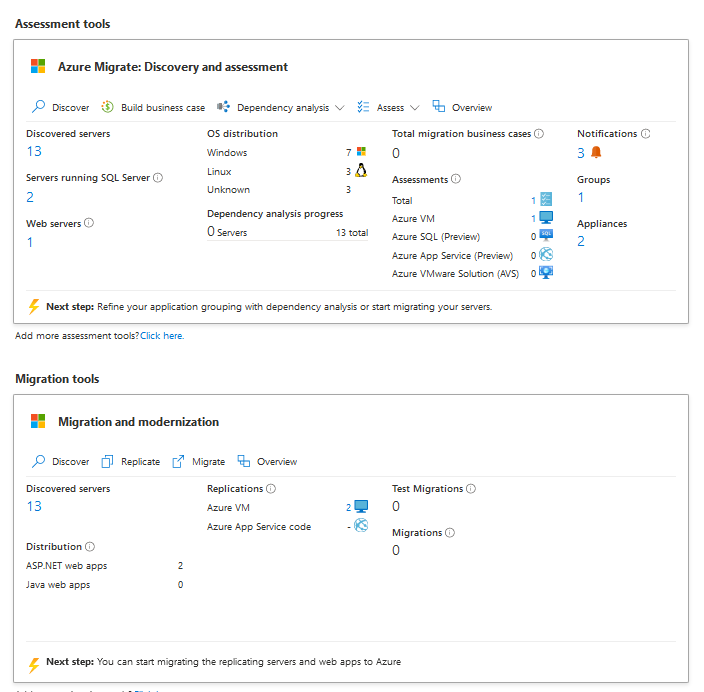
    This was a random issue. Your Azure Migrate project has access to the free assessment tool and the free migration tool. A functioning project should look like the image below.
    A functioning project with the migration tool added

    But the first interaction of my project would not allow me to add that tool. I searched the message boards and could not find a solution to my problem. So, I did the next best thing and started a new project.

    Issue 2: The x86 version of VC++ Redist 2019 may cause the gateway service to fail

    This issue is specific to using the PowerShell version instead of the virtual appliance. This was a problem for me because I had both the x86 and x64 versions of VC++ Redist 2019 installed on my Server VM as shown below.

    I searched for the problem on the internet and found this post in Microsoft’s forum. The advice given was to uninstall both versions, but in my case, that just caused another issue. The solution that worked best for me was to only uninstall the x86 version. Once done, the installation was completed successfully.

    Issue 3: Insufficient Cores Available in the Subscription (During the migration prechecks)

    I worked my way through all the other issues and then ran into this one.

    I had enough cores available in the normal compute SKUs, so this one confused me a bit. The issue, in this case, is that I did an assessment, and used the assessment settings to determine the compute SKU I was going to use but did not properly modify the settings in my assessment. Once I removed reserved instances from my assessment and recalculated the assessment, I got a normal compute SKU and was able to complete my migration successfully.

    Conclusion

    While the Azure Migrate tool may not be as easy to use as some of the paid tools, it can be very useful if you are cost-constrained.

    How to Create an Azure Key Vault to Store Secrets

    In my earlier post, I demonstrated how to back up my Windows 11 PC’s files using Azure Backup. Now, I am going to review how to create an Azure Key Vault to store that passphrase more safely and securely.

    Prerequisites

    • An existing Azure subscription
    • A passphrase to save

    Step 1: Create the Azure Key Vault

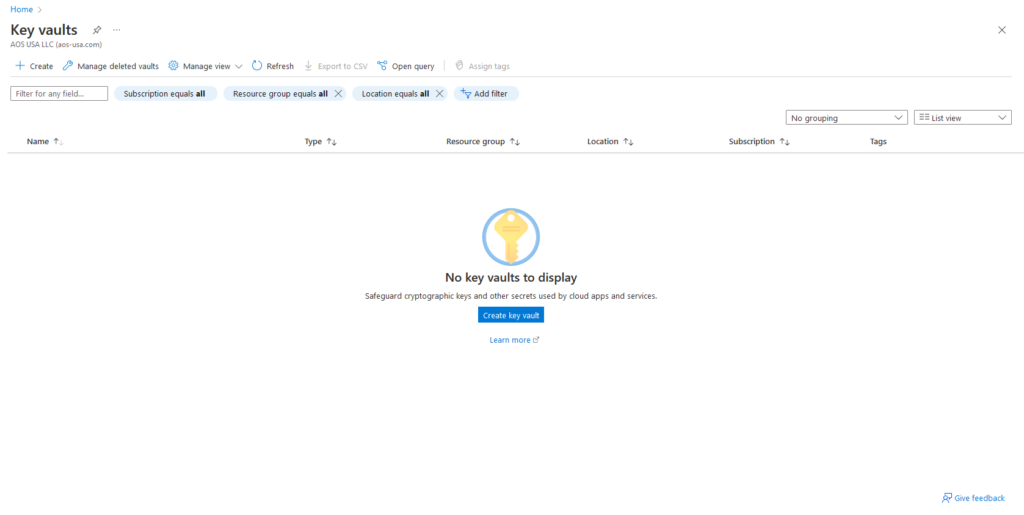
    To create a key vault, you must log in to the Azure portal and search for “key vault”. Once done, you will see the above screen. Click “Create Key Vault” to continue.

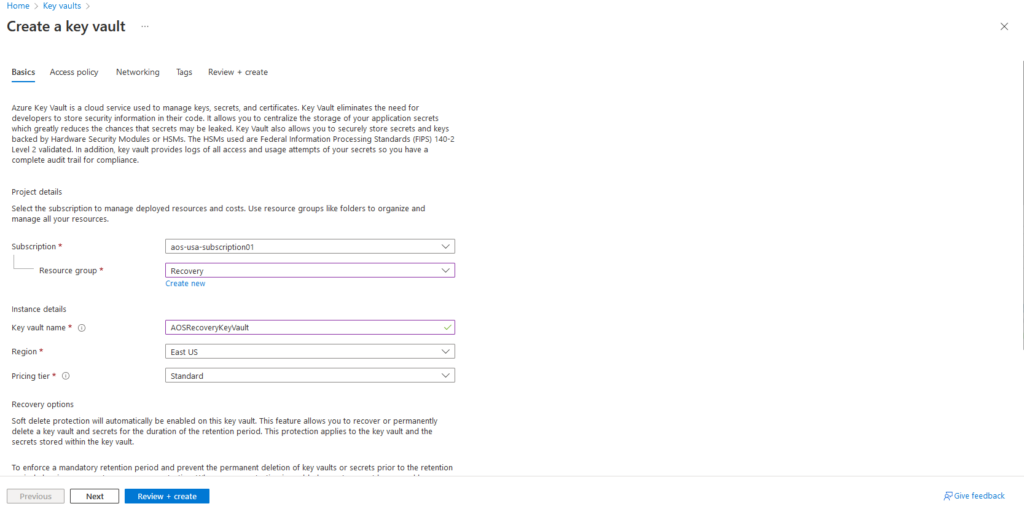
    In the above screen, you are asked to choose a resource group or create one. Again, in this case, I chose to create a new resource group. Then you are asked to create a unique key vault name and choose a region, and pricing tier. I chose the East US region and the standard pricing tier. There is no need to use the premium tier in this case. Once your choices are made, click “Review + Create” to create the key vault.

    Step 2: Add Secret to Vault

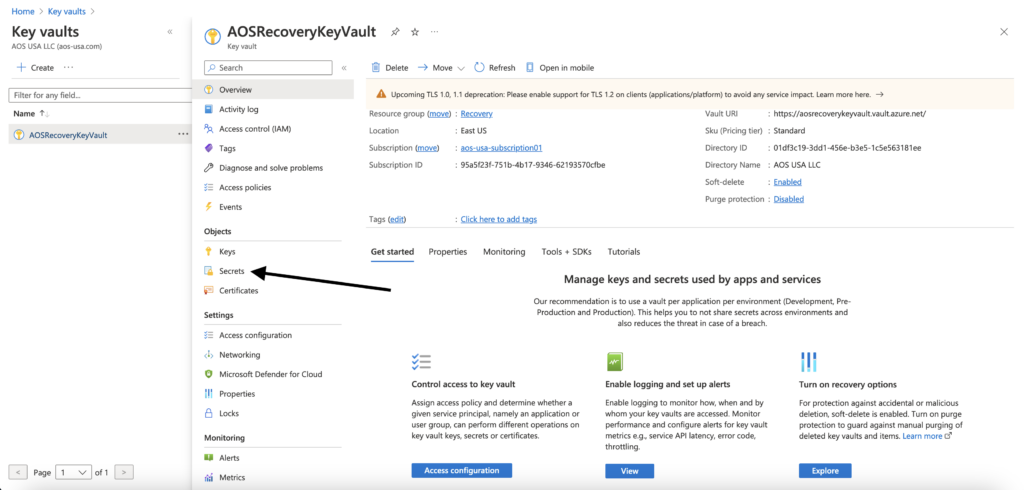
    Once the key vault has been deployed, click “Secrets” from the menu on the left side of the screen.

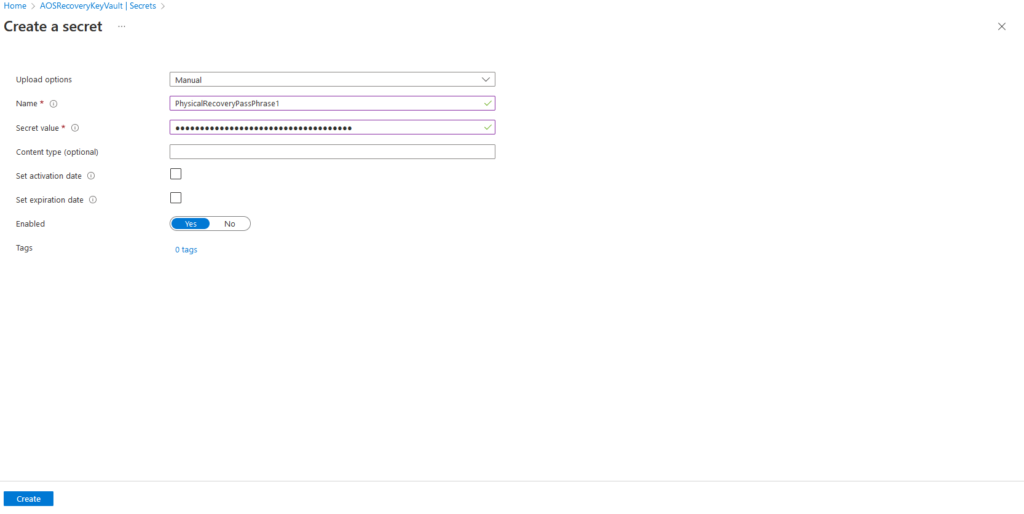
    Now you can add the recovery services vault secret (or any secret for that matter) to the Key Vault. Be sure to label it something that makes sense and click “Create”

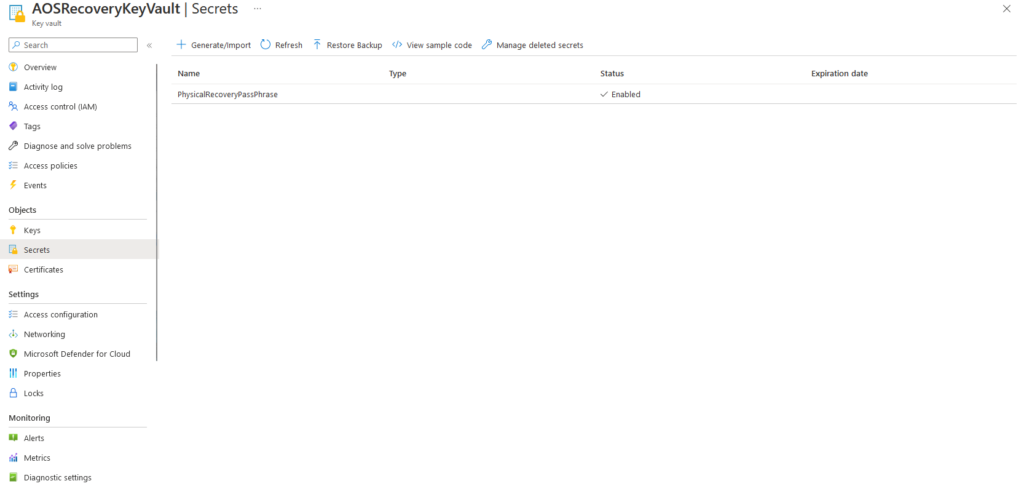
    Finally, you should be able to see your secret in the recovery services vault.

    Conclusion

    This is a really simple way to start working with Azure Key Vault. Now you have your secret saved in a location that is not easily compromised or exposed to failure as your home PC.

    How to Backup a Windows 11 PC with Azure Backup

    Over the past few months, I have built a new PC, a home lab, and an Azure environment. Over the next few weeks, I will work to better integrate all three. One of the first steps in this process is setting up Azure Backup for my Windows 11 PC.

    Prerequisites

    • An existing Azure subscription
    • A Windows PC

    Step 1: Create a Recovery Services Vault in the Azure Portal

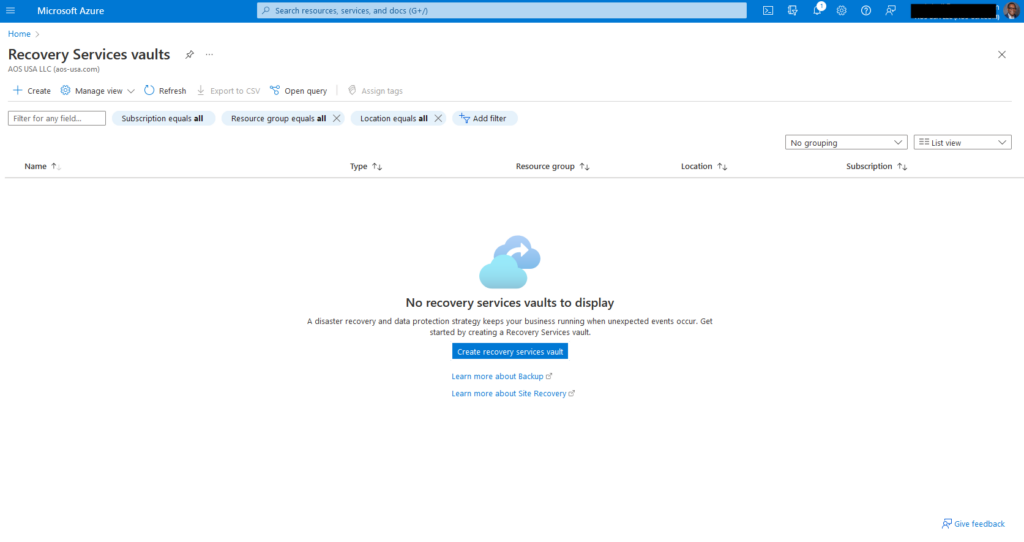
    Login to your azure portal and search for the “Recovery Services Vault”. If you do not have a recovery services vault, you will create one here.

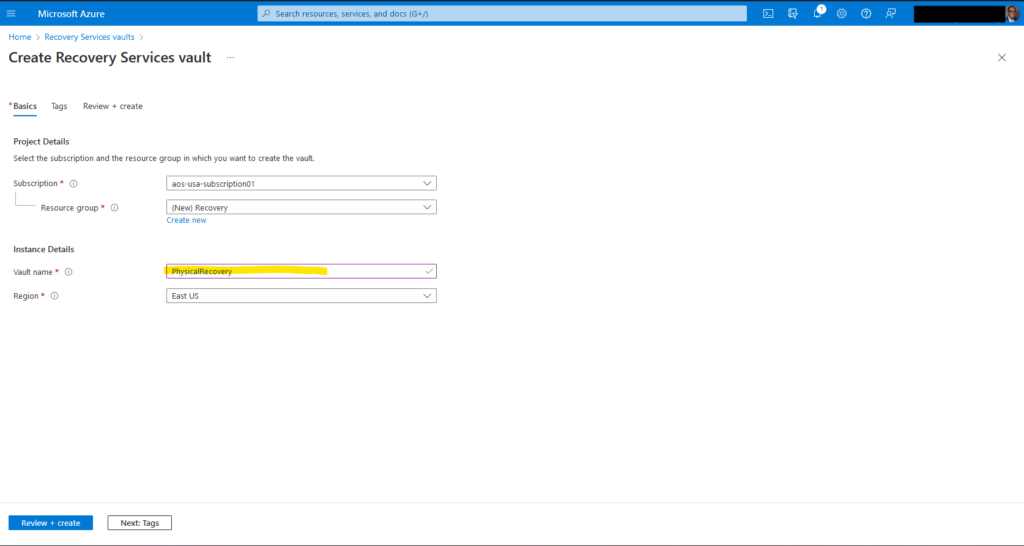
    From there you are taken through a wizard to create the Recovery Services Vault. Here you will need to either choose an existing resource group or create a new one. I decided to create a new one because all my resource groups contain related items that can be deleted together. Additionally, you are asked to choose a unique name for the Recovery Services Vault. Once these two things are done, you can click “Review + Create”, and in a few moments, the Recovery Services Vault will be created.

    Once your Recovery Services Vault has been created, you can click on the resource and see a menu on the left side. From that menu, you will click Backup. Then you have two choices to make: “Where is the workload running?” and “What do you want to backup?” In my setup, I chose “On-Premises” and “Files and Folders”. Note that it is currently not possible to back up the system state for Windows 11 machines.

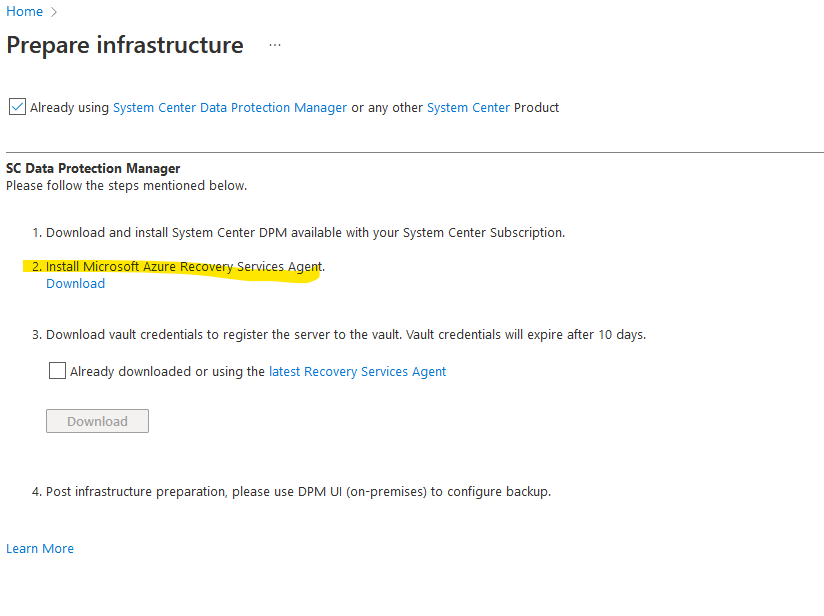
    Once you click the “Prepare Infrastructure” button, you’ll be brought to the above screen. At this point, is important that you both download the Azure Recovery Services Agent and MOST IMPORTANTLY, the vault credentials. In this example, I am saving the vault credentials to my desktop, but they can and should be saved to Azure Key Vault.

    Step 2: Install the Azure Recovery Services Agent

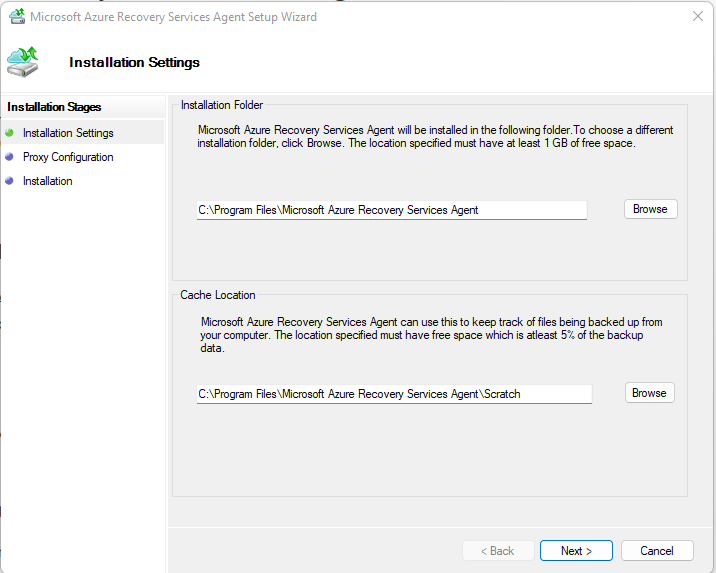
    You’ll first need to download the Azure recovery services agent from the previous screen.

    The install screen for the Azure recovery services agent should look like the one above.

    The Installation will need .Net Framework 4.5 and Windows Powershell. You will need to install these items to proceed with the installation.

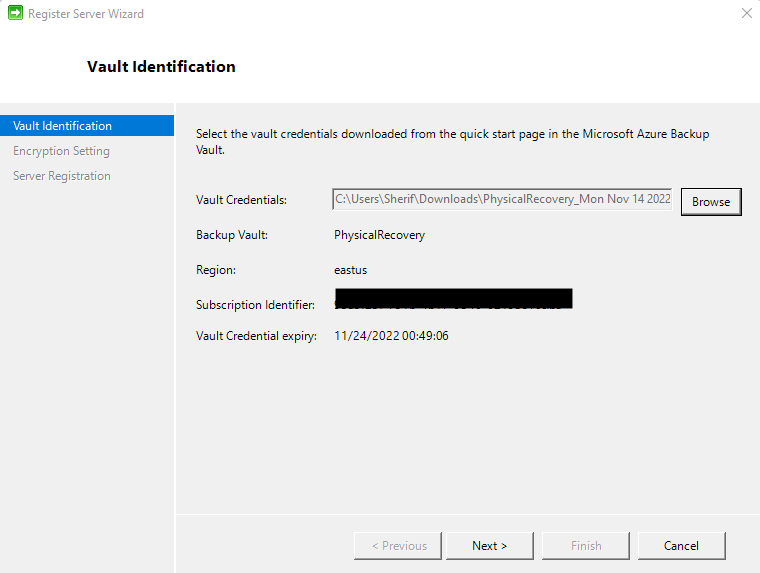
    As shown in the above screen, this is where you will use the saved vault credentials from the earlier step.

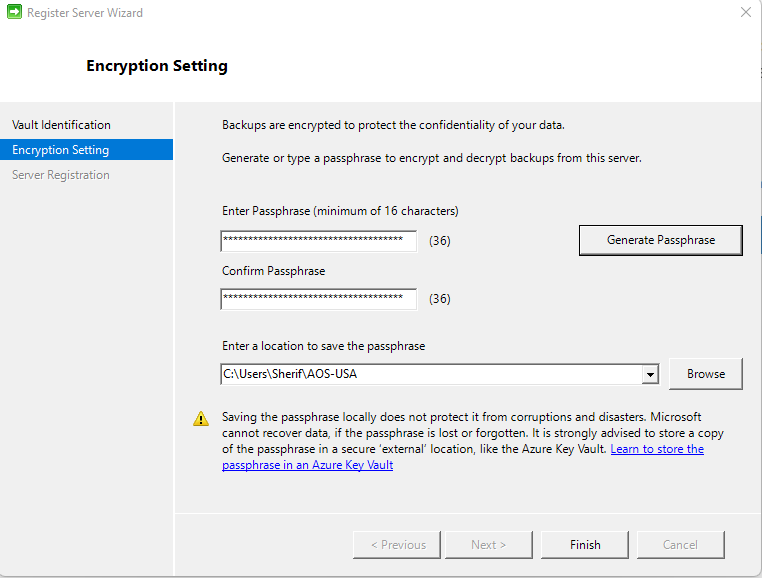
    Next, you will be asked to enter a passphrase and a location to save it. You can use your own passphrase generator, but I found it easier to use the passphrase generator provided here. You may also save the passphrase on your local machine as I did here. Once done, click Finish to complete the installation.

    Step 3: Configure Your Backup Settings

    Now that the installation has finished, you will be able to schedule your first backup.

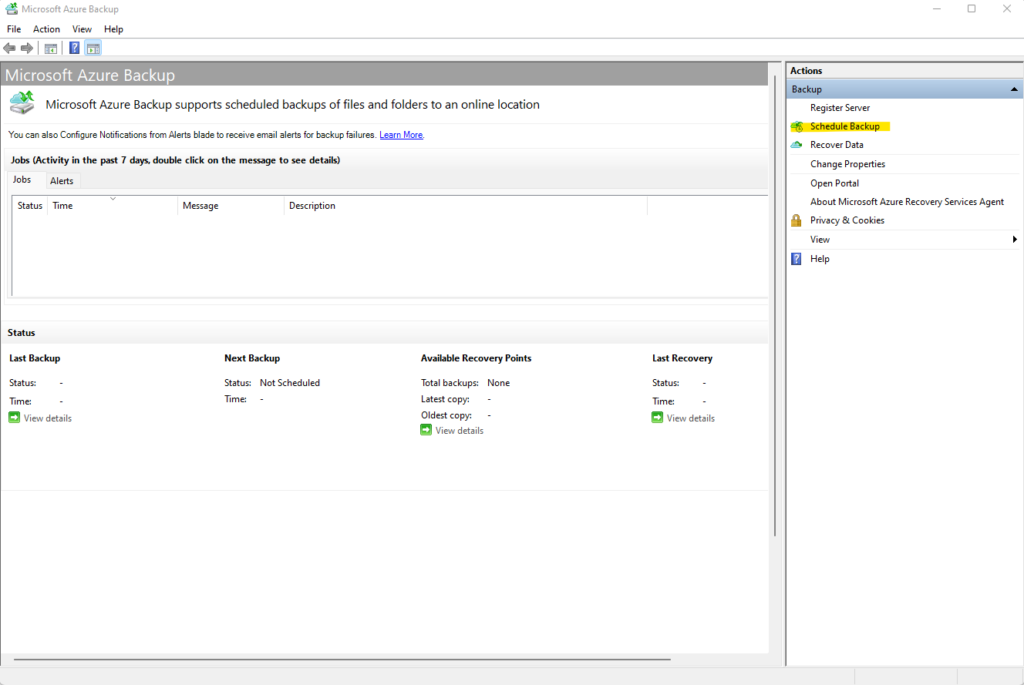
    Open the Azure Backup client on your PC and click “Schedule Backup” on the right side of the screen.

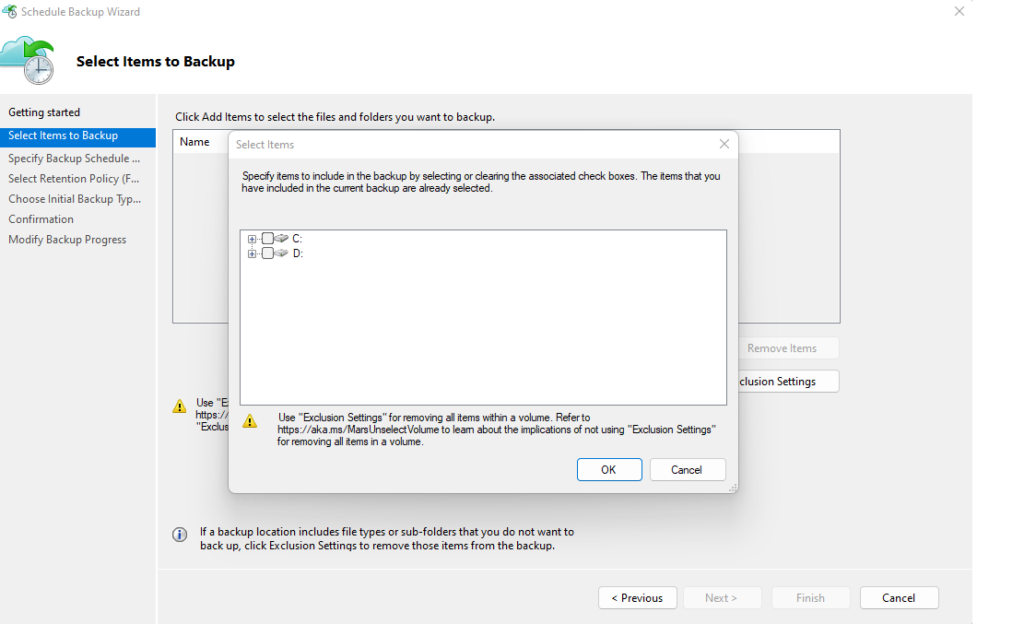
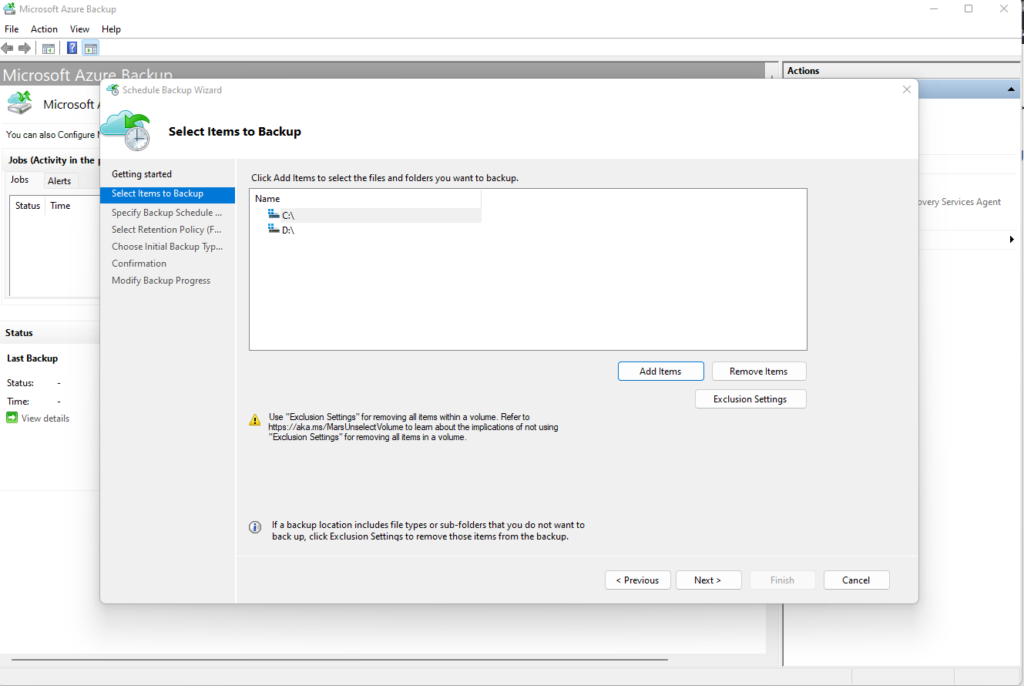
    From the screen, as shown above, you will choose which drives you will backup.

    You also have the option to exclude some folders and files.

    You can specify the times of the backup up to three times a day.

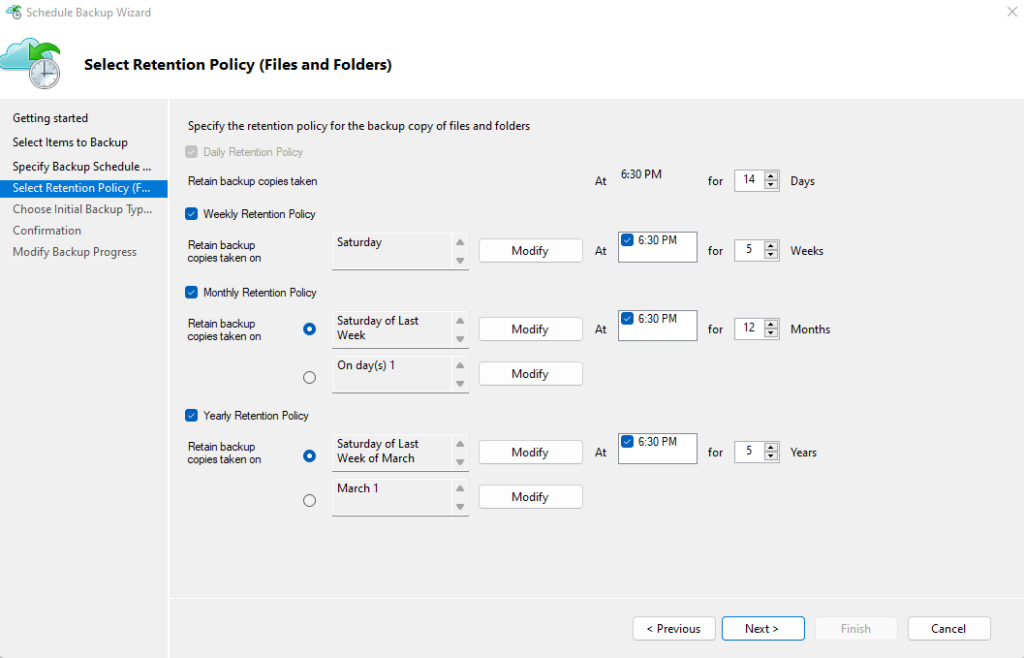
    Here you can choose the retention schedule. Initially, I was given what I believed was too many restore points, I adjusted mine accordingly as you can see above.

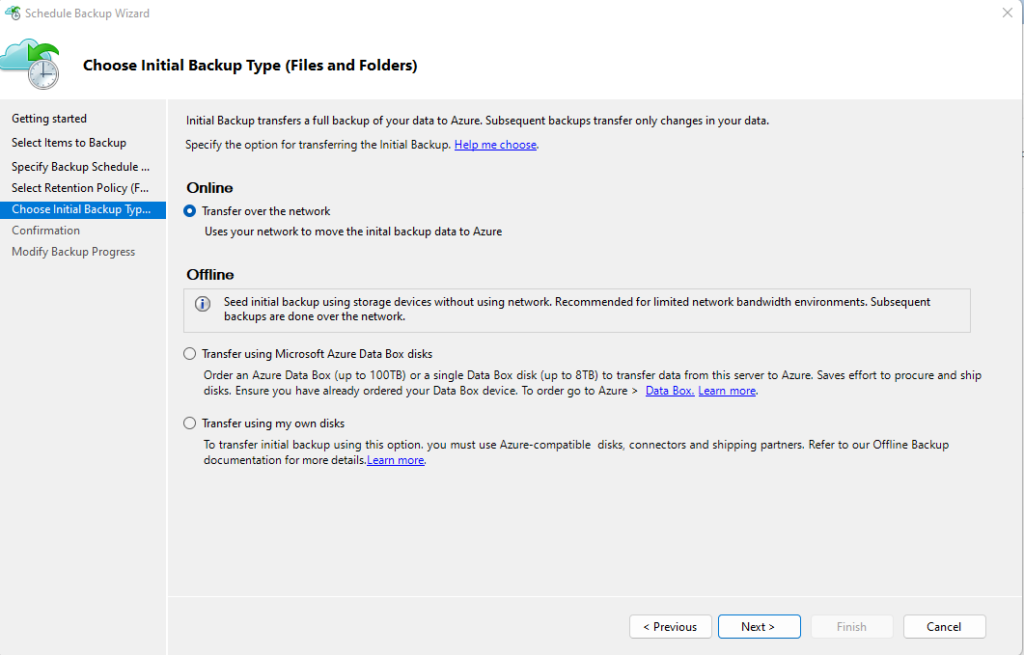
    This is one of the final screens. You are given the choice to send the data online or offline by sending the disks directly to Azure. I chose to send my data online. After this screen, you will click next a few more times and then you are ready to start your first backup at the scheduled time.

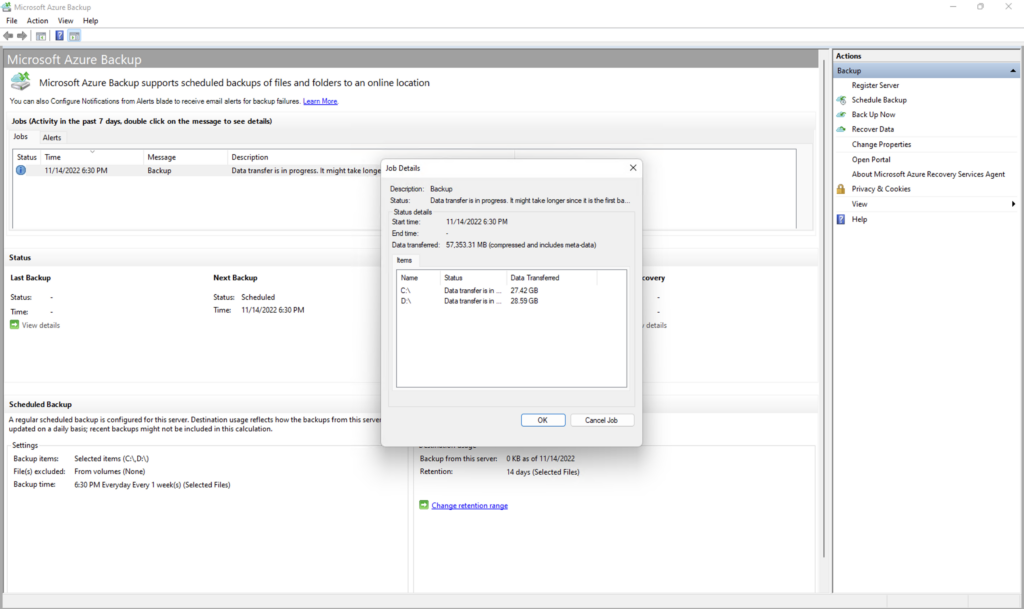
    Once my download has started, I can verify it is working from the Azure Backup App.

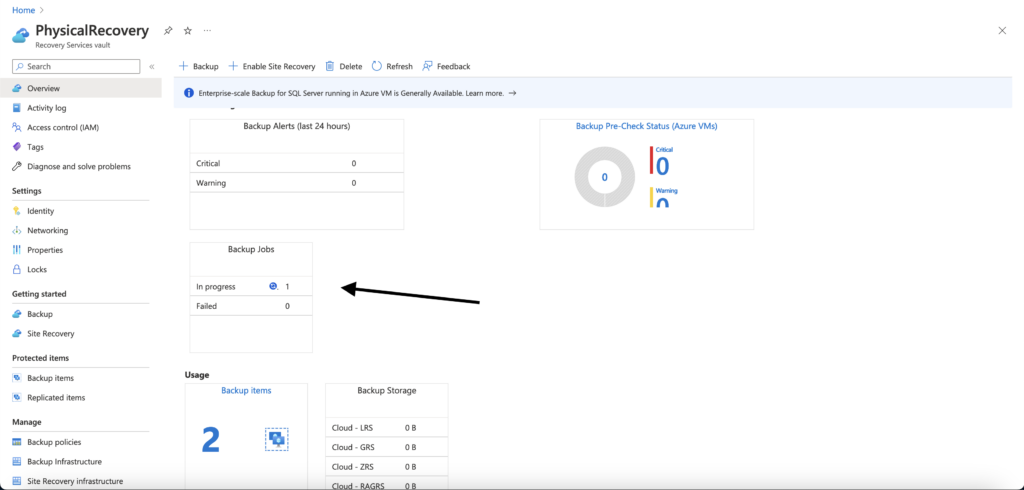
    I can also go to my Recovery Services Vault, click the Backup Dashboard, and verify that the job is running.

    Conclusion

    While there are other ways to backup a PC, this is one of the better ways to get started working with Azure backups and Site Recovery.